
French manicure tip guides are small, reusable stickers or stencils designed to help create crisp, precise lines for the iconic white tip nail design. They enhance the manicure process by ensuring symmetry and cleanliness, making it easier to achieve professional-looking results at home. These guides are especially popular among nail enthusiasts and beginners alike, as they simplify the application of the classic French tip, allowing for flawless, elegant finishes every time.
What Are French Manicure Tip Guides?
French manicure tip guides are small, adhesive stickers or stencils designed to help create sharp, clean lines for the iconic white tip design. They are placed along the edge of the nail to act as a barrier, ensuring the polish stays precisely where desired. These guides come in various shapes and sizes to accommodate different nail lengths and tip preferences. Made from flexible materials, they are easy to apply and remove without damaging the nail. By providing a clear boundary, tip guides make it simpler to achieve the classic French manicure look, whether at home or in a salon. They are reusable and widely regarded as essential tools for nail art enthusiasts;
The Purpose of Using Tip Guides
French manicure tip guides are essential tools designed to help achieve precise, clean lines and prevent polish from bleeding beyond the desired area. Their primary purpose is to simplify the process of creating the iconic white tip, ensuring a professional finish. By acting as a barrier, they allow for crisp, sharp edges, making it easier to paint the tip without mistakes. Tip guides are particularly useful for maintaining symmetry and consistency across all nails. They cater to both novice and experienced nail artists, offering a foolproof method to achieve flawless results. Their versatility and ease of use make them a must-have for anyone aiming for a polished, elegant French manicure look.
Evolution of French Manicure Designs
French manicure designs have evolved significantly over the years, transitioning from the classic white tip to more contemporary and versatile looks. Modern trends now include variations like “iced French tips,” featuring a glazed finish, and “foggy French,” which softens the traditional stark contrast. These updates allow for personalization, catering to different preferences and styles. The use of tip guides has played a crucial role in this evolution, enabling precise application and experimentation with new techniques. From subtle micro-French tips to bold, colorful designs, the adaptability of French manicures has kept them relevant and trendy, making them a timeless yet ever-changing staple in nail art.
History and Popularity of French Manicures
Originating in 1930s Paris, French manicures gained global popularity through Hollywood icons. Their timeless elegance and versatility have made them a enduring favorite, adapting to modern trends like micro-French tips.
Origins of the French Manicure
The French manicure originated in the 1930s in Paris, where it became a symbol of elegance and sophistication. Initially, it featured a natural pink base with white tips, creating a clean, polished look. Hollywood stars and fashion icons popularized this style, making it a global phenomenon. The design was revolutionary for its time, offering a subtle yet striking contrast that complemented various outfits. Over time, the French manicure evolved, incorporating different colors and techniques, but its core essence remained unchanged. Today, it continues to be a timeless classic, cherished for its versatility and enduring appeal.
Why French Manicures Remain Timeless
French manicures remain timeless due to their sophisticated and versatile appeal. The classic combination of a neutral base and white tips creates a clean, polished look that complements any style. This design is universally flattering, making it a go-to choice for both casual and formal occasions; Its simplicity ensures it never goes out of fashion, while its adaptability allows for modern twists, such as varying tip widths and colors. The French manicure’s enduring popularity stems from its ability to exude elegance while remaining understated, making it a staple in nail art history and a continued favorite among beauty enthusiasts worldwide.
Modern Trends in French Tip Designs
Modern French tip designs have evolved to include fresh twists on the classic look. One popular trend is the “iced French tip,” featuring a glazed, frosted appearance for a contemporary vibe. Another innovation is the “foggy French” manicure, which softens the traditional stark white tip by reducing opacity for a subtler effect. Additionally, “micro-French tips” have gained traction, offering a daintier, thinner version of the classic design. These modern interpretations allow for greater creativity while maintaining the timeless elegance of the French manicure. Whether opting for bold contrasts or softer blends, these trends cater to diverse preferences, ensuring the French tip remains a fashion staple.
Techniques for Achieving Perfect French Tips
Mastering French tips requires precision and the right tools. Using guides ensures crisp lines, while steady strokes and proper preparation guarantee a flawless finish. Practice makes perfect!
Traditional French Manicure Technique
The traditional French manicure technique involves painting a nude or pink base coat across the entire nail, followed by a crisp white tip at the edge. To achieve this classic look, nail guides or stickers are placed below the tip to create a sharp line. After applying the white polish, the guides are removed to reveal a clean, precise edge. This method ensures symmetry and professionalism, making it a timeless choice for elegance. The technique relies on careful preparation and steady application, with the guides serving as a stencil to prevent smudging. This approach remains a cornerstone of French manicure artistry, offering a sophisticated finish that never goes out of style.
Modern Variations of the French Tip
Modern variations of the French tip have evolved to include trendy twists while maintaining the classic elegance. One popular style is the “iced French tip,” which features a glazed, frosted appearance achieved by layering sheer white polish. Another variation is the “foggy French,” where the white tip is softened for a less stark look. Additionally, micro-French tips offer a delicate, thinner version of the traditional design. These updates allow for creativity, with options like colored tips, ombre effects, or artistic details. Nail guides remain essential for achieving these modern looks, enabling precise application and innovative designs that keep the French tip fresh and fashionable in today’s beauty trends.
Using Nail Guides for Crisp Lines
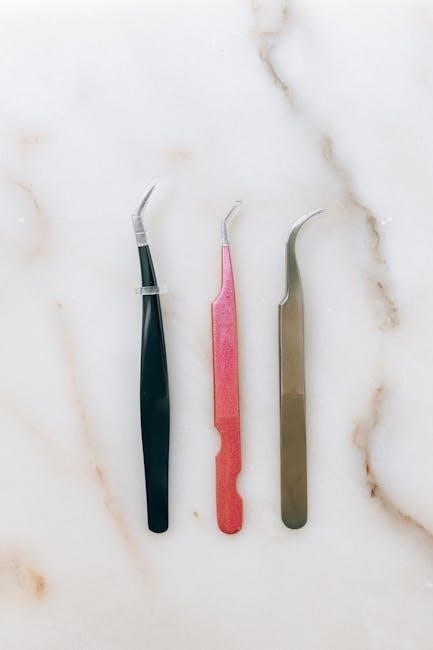
Nail guides are indispensable for creating sharp, defined lines in French manicures. These small stickers or stencils are placed below the nail tip, serving as a barrier between the white polish and the rest of the nail. They ensure the smile line is smooth and even, preventing polish from bleeding. Guides come in various shapes, from curved to straight, allowing customization. Proper application involves pressing the guide firmly to avoid seepage. After painting, guides are peeled off, revealing crisp, professional-looking tips. This technique is especially useful for beginners, as it simplifies the process and guarantees flawless results every time.
Tools and Materials Needed
French manicure tip guides, along with nail polish, base coat, and top coat, are essential for achieving the classic look. Nail cleanser, lint-free wipes, and guide stickers ensure crisp lines. A nail art brush or pen can refine edges. Optional tools include nail files and buffers. Guides come in various shapes and sizes, catering to different nail types. Proper preparation with a base coat is crucial for long-lasting results. Top coat seals the design, adding shine. These tools collectively simplify the process, making it accessible for both professionals and DIY enthusiasts to create polished, elegant French tip nails.
Nail Polish Colors for French Tips
The classic French tip features a white polish for the tip, paired with a nude or soft pink base coat; However, modern variations allow for creativity, with pastel shades, bold colors, or even metallic finishes. For a timeless look, opt for a crisp white tip and neutral base. Alternatively, experiment with colored tips, such as soft pinks, corals, or reds, for a personalized touch. The choice of polish depends on personal style and the desired aesthetic. Always use a base coat to protect nails and a top coat to seal the design. Proper application ensures a polished, professional finish for any French tip design.
Essential Tools for a DIY French Manicure
To achieve a professional-looking French manicure at home, you’ll need a few key tools. Start with nail cleanser and lint-free wipes to prepare your nails. French manicure tip guides are indispensable for creating crisp, clean lines. A base coat is necessary to protect your nails and ensure polish adhesion. Choose a good-quality white polish for the tips and a neutral shade for the base. A top coat will seal your design and add shine. Additional tools like a nail art brush or a manicure pen can help refine details. Finally, nail polish remover and cotton swabs are handy for clean-ups. These tools will help you master the classic French tip with ease.
Best Nail Guides for Beginners
For those new to French manicures, the best nail guides are easy to use and ensure crisp, clean lines. Reusable sticker guides are ideal, as they come in various shapes and sizes to suit different nail types. Look for guides with clear instructions and a firm adhesive to prevent polish seepage. Some sets include both curved and straight edges, offering versatility. Nail tip guides with a smile line design are particularly popular for creating the classic French look. Many kits also include tools like a manicure pen for detailing. Using high-quality guides can make the process simpler and more precise, even for inexperienced users. They are reusable, making them a cost-effective choice for practicing the technique.
Step-by-Step Application Guide
Apply guides below the nail tip. Paint carefully, ensuring crisp lines. Let polish dry, then remove guides for a clean, professional finish at home.
Preparation of the Nail Surface
Preparation is key to achieving a flawless French manicure. Start by cleaning the nails with a nail cleanser and lint-free wipes to remove oils and residue. Push back cuticles gently and trim any excess. Shape the nails to your desired form using a nail file or buffer. Lightly buff the surface to create a smooth base for polish. This step ensures better adhesion of the polish and a professional finish. Finally, apply a thin layer of clear base coat to protect the nails and promote even color distribution. Proper preparation prevents chipping and enhances the longevity of your French tip design.
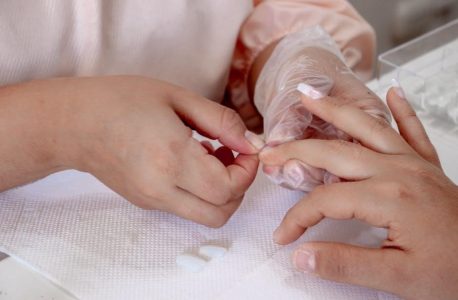
Applying the Tip Guides
Applying French manicure tip guides is a straightforward process that ensures crisp, clean lines. Start by selecting guides that match the shape of your nails. Peel the sticker from its backing and place it gently below the free edge of your nail, aligning it with the desired tip shape. Press firmly to secure the guide, ensuring no air bubbles form. For a sharper line, use a credit card or cuticle pusher to press the guide firmly against the nail. This step is crucial for preventing polish from seeping under the guide. Properly applied guides create a clear boundary for painting, resulting in a professional-looking French tip. Customize the placement based on your nail shape and preferred tip width for the best results.
Painting the Perfect White Tip
Painting the perfect white tip requires precision and a steady hand. Once the tip guides are securely in place, dip a nail art brush or a thin nail polish brush into white polish. Starting at one edge of the guide, paint a smooth, steady line along the edge, following the natural curve of your nail. For a crisp finish, paint in one continuous stroke, using light pressure to avoid pooling. Allow the first coat to dry slightly before applying a second if needed. Use a lint-free wipe or clean-up brush dipped in remover to erase any excess polish that seeps under the guide. This technique ensures sharp, professional-looking white tips every time.
Tips for Maintaining French Manicure
Regular touch-ups and avoiding harsh chemicals help preserve the French manicure. Apply a topcoat daily and gently clean around the nails to maintain crisp, polished tips longer.
Longevity of French Tip Nails
French tip nails can last up to two weeks with proper care. Using high-quality products and precise application techniques ensures durability. Avoiding harsh chemicals and excessive water exposure helps prevent chipping. Regular touch-ups and applying a protective topcoat maintain the polished look. Properly sealing the edges of the nail prevents peeling, extending the manicure’s lifespan. To enhance longevity, use nail guides for crisp, clean lines during application. This attention to detail ensures a flawless finish that withstands daily wear. With the right aftercare, French tip nails remain vibrant and intact, offering a timeless elegance for any occasion.
Touch-Up Techniques
Touch-ups are essential for maintaining the pristine look of French tip nails. Start by gently removing any chipped polish with a nail polish remover. Use a fine brush to repaint the white tip, following the original guide lines to ensure accuracy. Apply a thin layer of topcoat to seal the polish and add shine. For minor smudges, dip a cotton swab in remover and carefully erase the imperfections without disturbing the surrounding area. Regular touch-ups every few days prevent the nails from looking worn. These quick fixes extend the life of your manicure, keeping it fresh and polished for longer periods. Consistency is key to maintaining professional-looking results.
Nail Care After a French Manicure
Proper nail care after a French manicure is crucial for maintaining its appearance and promoting healthy nail growth. Avoid exposure to harsh chemicals or excessive water, as this can weaken the nails and cause the polish to chip. Apply a moisturizing cuticle oil daily to hydrate the nails and surrounding skin. Gently wash hands with mild soap and avoid using nails as tools to prevent damage. Reapply a thin layer of topcoat every few days to maintain shine and protect the polish. When removing the manicure, use a gentle nail polish remover and avoid scraping or peeling the polish off. Keep nails trimmed and filed to prevent breaks, ensuring long-lasting, healthy results.